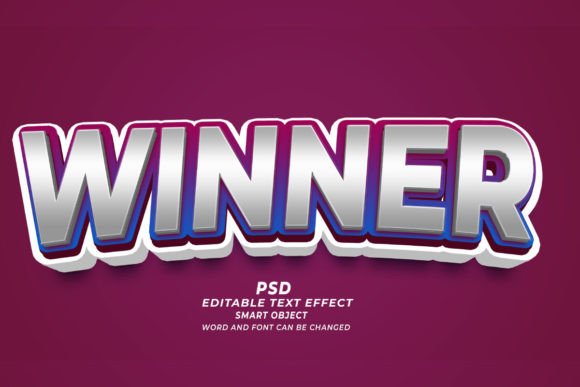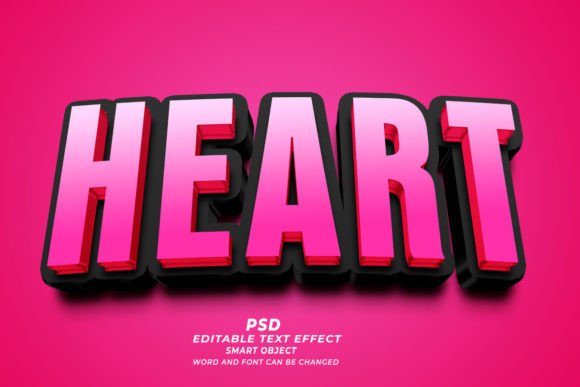
Mastering the Hearts PSD 3D Editable Text Effect for Professional Design Results
In the fast-paced world of digital design, efficiency is just as critical as creativity. Whether you are a seasoned graphic designer, a small business owner managing your own marketing, or a creator launching a new line of print-on-demand products, the pressure to deliver high-quality visuals quickly is constant. This is where tools like the Hearts PSD 3D Editable Text Effect become invaluable assets rather than mere shortcuts. However, simply downloading a template is not enough to guarantee professional results. Many users stumble not because the tool is flawed, but because they misunderstand how to integrate these pre-made effects into their unique workflows effectively.
Understanding the mechanics behind this specific Photoshop resource can save you hours of trial and error. At its core, this is a highly specialized Adobe Photoshop file that leverages Smart Objects to allow for rapid customization. You do not need to manually render shadows, bevels, or lighting effects from scratch. Instead, you open the file, double-click the designated Smart Object layer, replace the placeholder text with your own, and save. The software automatically updates the entire composition, applying complex three-dimensional styling to your new input. While this sounds straightforward, overlooking key technical details can lead to pixelated outputs, distorted proportions, or files that are incompatible with your intended print or web standards.
Avoiding Resolution and Scale Misconceptions
One of the most common mistakes beginners make involves ignoring the native resolution of the template. The Hearts PSD 3D Editable Text Effect is typically provided at a high resolution of 300 DPI (dots per inch). This standard is essential for print materials such as T-shirts, KDP book covers, and marketing flyers. A frequent error occurs when users resize the canvas significantly without adjusting the text layers or smart object dimensions accordingly. If you stretch a small text element to fill a large banner, the 3D effects may appear jagged or blurry, ruining the professional aesthetic.
To avoid this, always check the image size settings before you begin editing. If your project requires a different dimension than the template provides, it is better to scale the entire document uniformly using the "Image Size" dialog box while ensuring "Resample" is checked appropriately for your needs. For web banners, you might lower the DPI to 72 to reduce file size, but for any physical product, keep it at 300. Remember that changing the font size within the Smart Object is safe, but drastically altering the aspect ratio of the main canvas after designing can distort the 3D perspective. Always finalize your canvas size first, then edit your text.
The Pitfall of Font Compatibility and Licensing
Another overlooked detail is font management. These templates often come with specific fonts pre-selected to match the curvature and weight of the 3D heart shapes. When you replace the text, you might be tempted to use a font that is not installed on your system or one that lacks the necessary glyphs. This can cause Photoshop to substitute it with a default font like Myriad Pro or Arial, which rarely complements the intricate 3D styling. The result is a disjointed look where the text feels separate from the effect.
Before you start designing, ensure you have the required fonts installed. If the template includes a font folder, install those files first. If you wish to use a different typeface, choose one with similar characteristics—such as bold weights for heavy 3D extrusions or rounded edges to match the heart motif. Furthermore, be mindful of licensing. Just because a font is included in a free or paid PSD download does not mean it is free for commercial use. Always verify the license of the typeface if you are creating designs for clients or selling products on platforms like Etsy or Amazon KDP. Using an unlicensed font can lead to legal issues down the line, negating all your hard work.
Maximizing Versatility Beyond Simple Text
Many users limit the utility of the Hearts PSD 3D Editable Text Effect by assuming it only works for words. This is a significant underutilization of the tool’s capabilities. Because the effect is built on Smart Objects and layer styles, it can often be applied to simple shapes, logos, or icons. For instance, if you are creating a brand logo that incorporates a heart symbol, you can place your vector shape into the Smart Object instead of text. This allows you to create cohesive branding materials where your logo shares the same dimensional depth and lighting as your headlines.
However, when using shapes instead of text, pay attention to the complexity of the path. Highly intricate vectors may not render the 3D extrusion cleanly if the underlying effect relies on specific text-layer properties. Test simple shapes first. If you find the effect does not apply correctly to a custom shape, consider converting your shape to a smart object within the main file and applying similar layer styles manually, using the template as a visual reference for lighting angles and shadow opacity. This hybrid approach ensures you maintain the visual consistency of the template while expanding its application to broader design elements.
Ensuring Color Accuracy for Print and Web
Color management is another area where errors frequently occur. The vibrant reds and pinks typical of heart-themed designs look stunning on screen but can print muddy or dull if the color profile is incorrect. Most PSD templates are set to RGB (Red, Green, Blue) mode, which is ideal for web banners, social media posts, and digital marketing materials. However, if you are sending your design to a printer for T-shirts or book covers, you must convert the document to CMYK (Cyan, Magenta, Yellow, Key/Black) mode.
Converting from RGB to CMYK can shift colors, often making bright reds appear darker or less saturated. To mitigate this, make your final color adjustments after converting the mode. Use adjustment layers like "Curves" or "Hue/Saturation" to tweak the tones until they match your expectations. Additionally, always request a proof from your printer if possible. Relying solely on your monitor can be misleading, as screens vary widely in calibration. By understanding the difference between digital and print color spaces, you ensure that the Hearts PSD 3D Editable Text Effect looks just as impactful in hand as it does on your screen.
Streamlining Your Workflow for Better Efficiency
Finally, treat these templates as starting points, not final products. The true value lies in customization. Do not simply swap the text and export. Take time to adjust the background, add complementary graphics, or tweak the lighting effects to suit your brand identity. The "click and edit" nature of Smart Objects is designed to speed up the tedious parts of design, freeing you to focus on creative decisions. By avoiding the common pitfalls of resolution neglect, font mismatches, and color profile errors, you transform a simple template into a powerful component of your professional design toolkit. This approach ensures that every project, whether a quick social media post or a high-stakes book cover, maintains a polished and cohesive appearance.